As I sat back and started reading my new posting I realize that I have mixed up the sequence of the pictures and postings. when I find some more blog time i will rewrite to make more sense. I apologize for my not so mad blogging skills.
Monday, January 31, 2011

I cover the tail with glue and inside the pocket wiping it around with a brush. Then carefully tap the tails into the pockets with a rubber mallet. Then I clamp each location to keep it from moving and let it dry.

The next day I use pocket screws to attach some rails in the back. I use these because they are a lot quicker and they will never be seen.

Now I have the case completed and can work on the trim and drawers.

So now I have all the pockets cut into the sides it's time to make the rails.
(sorry I did not notice I forgot to rotate the photo
If you know how to fix it let me know)

I start by cutting all the rails to the length I need for the inside of the cabinet plus the depth of the pockets on each side. Then by using a scrap piece I set up my router fence and dovetail bit in a router table. I then cut the matching dove tail on each end of the rails.

Now I have all the rails with matching dovetails on the ends. As you can see the top rail I only cut half of the dovetail. This is to fit the pocket that was cut all the way through on the top.

The lenght of the rail is a little longer than the pocket. This was done on purpose. To hide the end of the dove tail and pocket inside the cabinet. To cut this off I just slid the fence back to where I cut my mark off. Then ran them through.

Now I have rails and pockets, lets put them together.
Sliding Dove Tails

To make the sliding dove tails. I first start by laying out my dove tails on the edge of the side panels.

Then I place the jig I made so my edge marks line up. Then I clamp the jig in place. I set my router to cut at the depth I want and run the router through the jig.

As you can see I now have a great dovetail pocket in the side of the cabinet. I then move the jig to the next location and so on and so forth.

At the top of the case I cut the pocket all the way to the top otherwise I'm left with a flimsy peace of end-grain wood that will break out when I try to slip the rail in place.

The sides are connected together with rails that are dovetailed at each end. I used a sliding dovetail to join them together for the strength that that type of joint gives with a side of beauty.


This is a filing cabinet I built for my brother to give to his wife. The exterior case is made of knotty alder and the drawers are Baltic birch. It has 1" over travel drawer slides to get easy access to the entire drawer. I made the drawers big enough to handle her binders of music. Two of the drawers have file hanging systems in them and two are regular drawers. Thank goes out to my brother for his photos of the cabinet. I believe he created the look of sunlight because it was dark outside.
Monday, January 17, 2011

This is a photo of my girls room. The bunk beds come apart and make 2 twin size beds. I used construction fir for these to save cost. I had to let the lumber dry out for a while till it was usable.
Once it was dry I ran it through the planner and jointer to square it up. I put a few coats of primer and enamel on it. I made the bed about 5 years ago and it has held up really well. As a side note I made the chest next to the head of the bed as a gift for my wife for valentines day the year before we got married.

I made this dresser for my girls to consolidate stuff trying to save space. Its also made of pine but its all furniture grade pine. I wanted a smooth shiny finish but was not happy with the finish of bed so I used white lacquer from Sherwin Williams. It was very easy to use and I got the hand rubbed finish I wanted. This does hold a lot of stuff but doesn't really save on the space.
Tuesday, January 4, 2011

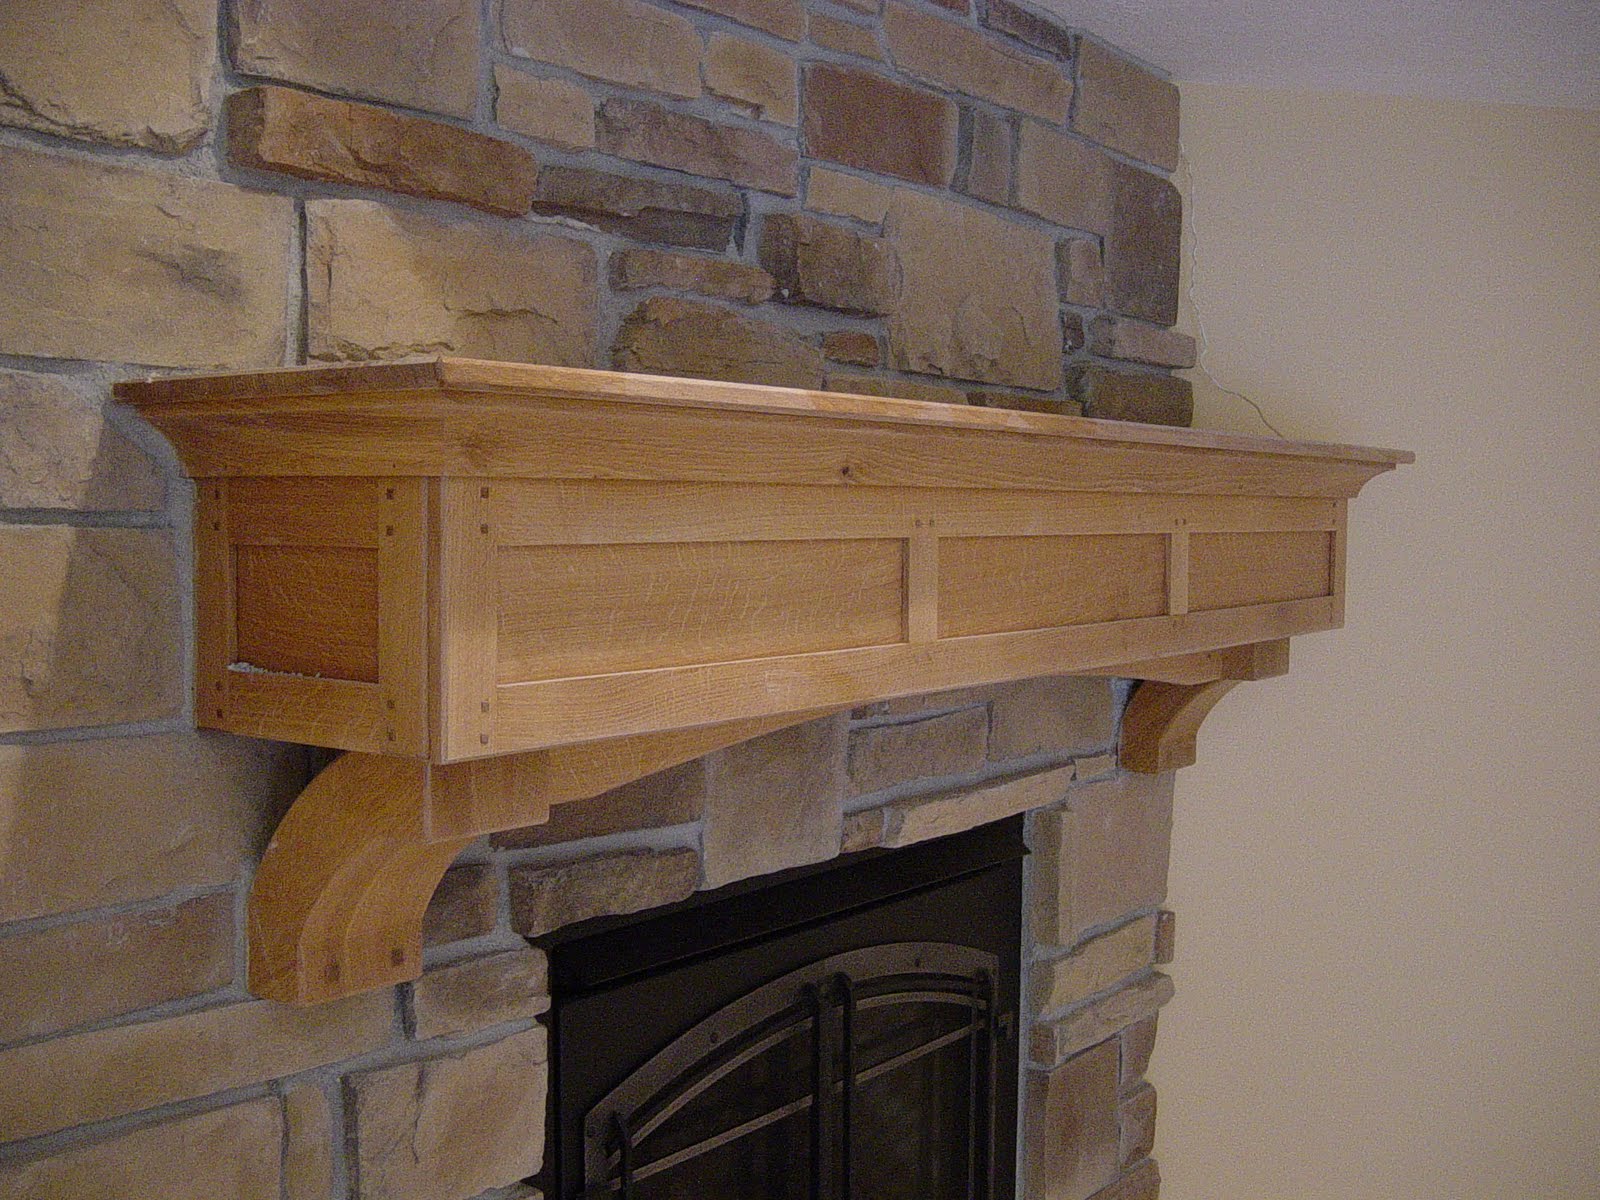
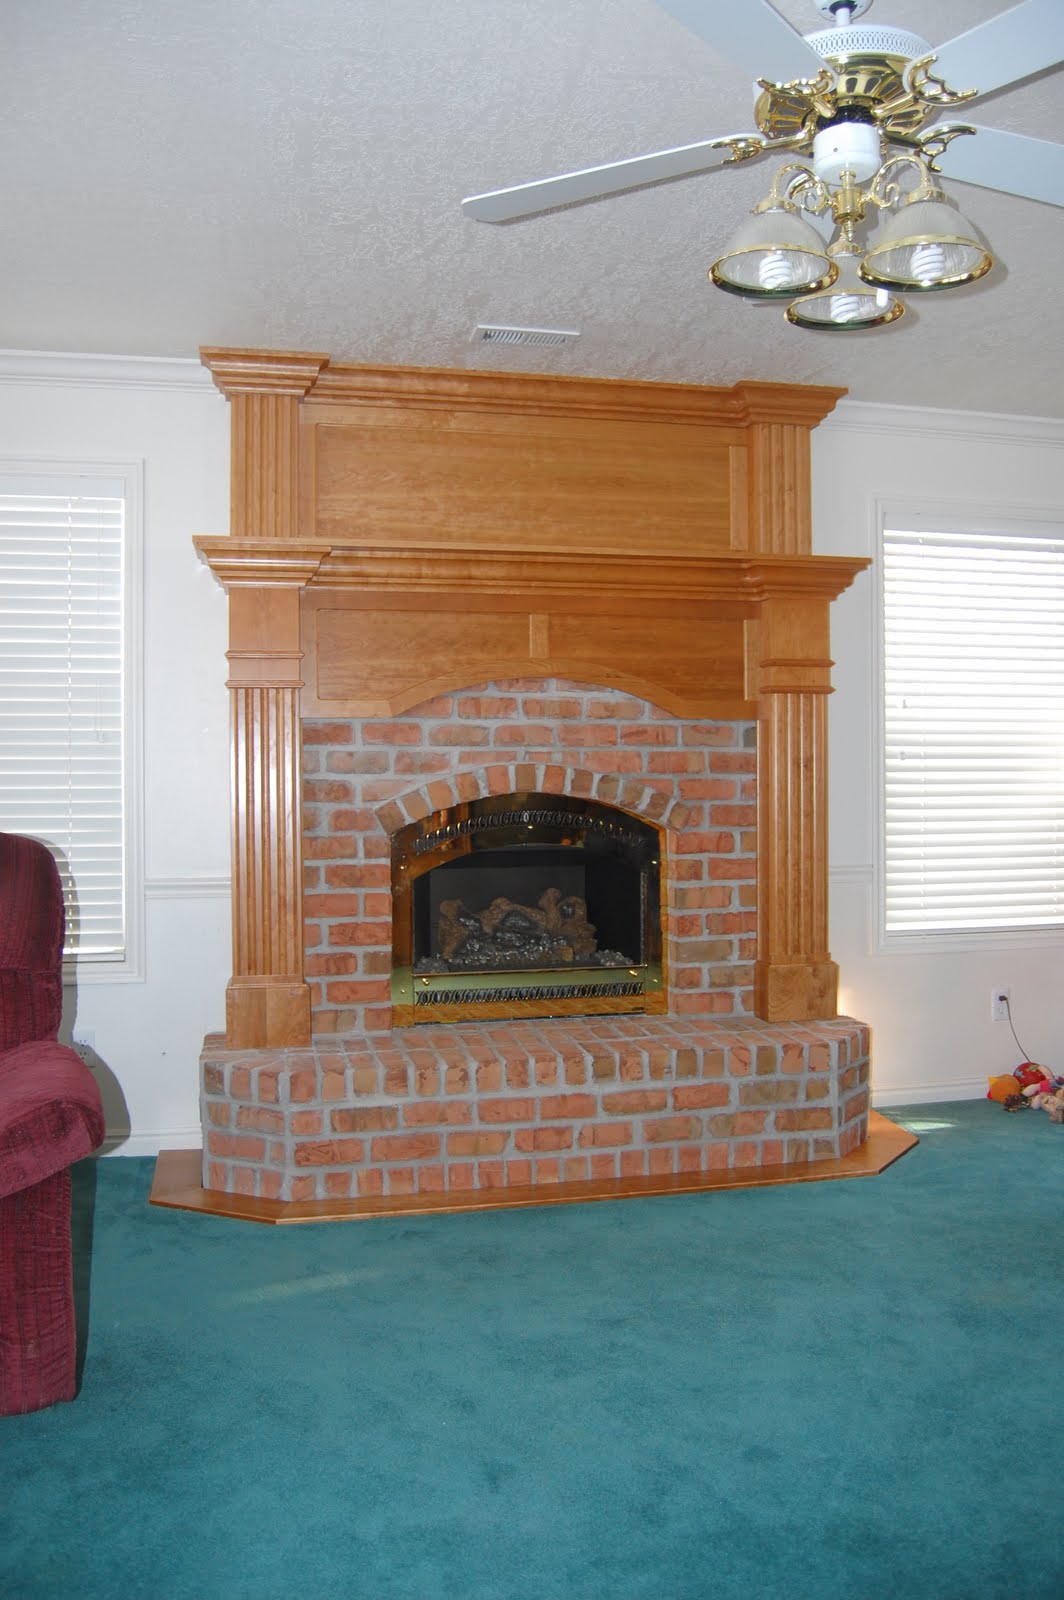
I built these two mantels a number of years ago for a home that we (Peterson Builders) were asked to finish. The mantels are both quarter sawn white oak. I built them to match the cabinetry in through out the rest of the house. This is the only time I have used square pegs up till now. I just used a variation of the square peg on my boys bed I'll try to post pictures of that soon.
Monday, January 3, 2011

This little jewel Is a Murphy Bed. While working for Peterson Builders I built this for a remodel we did. It was a fun project to build. I had to order the kit on line from Create-A-Bed.
The case is made from stain grade 3/4" plywood and the shelves are #2 pine with 1x6 T&G backs. I was able to build the whole thing in our shop and install it in the home like cabinetry.
Saturday, January 1, 2011

This is an Alder railing I did for a client at work. This was something new for me because of the double curved railings. Each riser and tread was different and the angle the risers met the skirt was different. It took a while but eventually I was able to get everything to fit together nicely. The niche in the wall next to the stairs was a prefab unit. just cut a hole in the wall the size of the back, glue it in and paint it.
This is a Cherry mantel I did for the same home owners as the wall of white shelves. This was fun because they let me have creative license. They let me know what they were picturing then I let loose. This project also included the brick, the fireplace, flue chase, siding, and roofing. We even had to go in and beef up the floor to hold the weight of the brick.

This was a project I did at work in 2009. This cabinet is made from a combination of Poplar and paint grade maple. I built this in our shop in Eden. Then had it finished with white lacquer. Then took it to the house and installed it. One thing I learned was white lacquer gets shows marks very easily. I have used white lacquer before with no problem. I think there was two much work that needed to be done on it once it was in the house. I ended up respraying it in the house. If I do not learn something today I wasted my day.


These columns are on both sides of the main room of the house with a big arch that connects them. The mantel and the columns and the railing posts were all made with traditional rail and stile panels out of rustic cherry. Beautiful wood because it has so much color and imperfections.


As requested here are some photos of the Neil home.
I built this railing in the home of a good friend back in 2003. Its made with rustic cherry with a clear polyurethane finish. I made the newel posts from rough 4/4 stock. The rail I had to purchase. In this photo I also laid the rustic Cherry floor with the help of Ryan. Well with Ryan's help we built this whole house from the ground up. This was definitely the longest project outside of work I have done. I will post more pictures of this project as I get them.
Subscribe to:
Posts (Atom)